Showing posts with label Gradient Nails. Show all posts

Wednesday, February 13, 2013

Koi Nails inspired by Natasha Wescoat

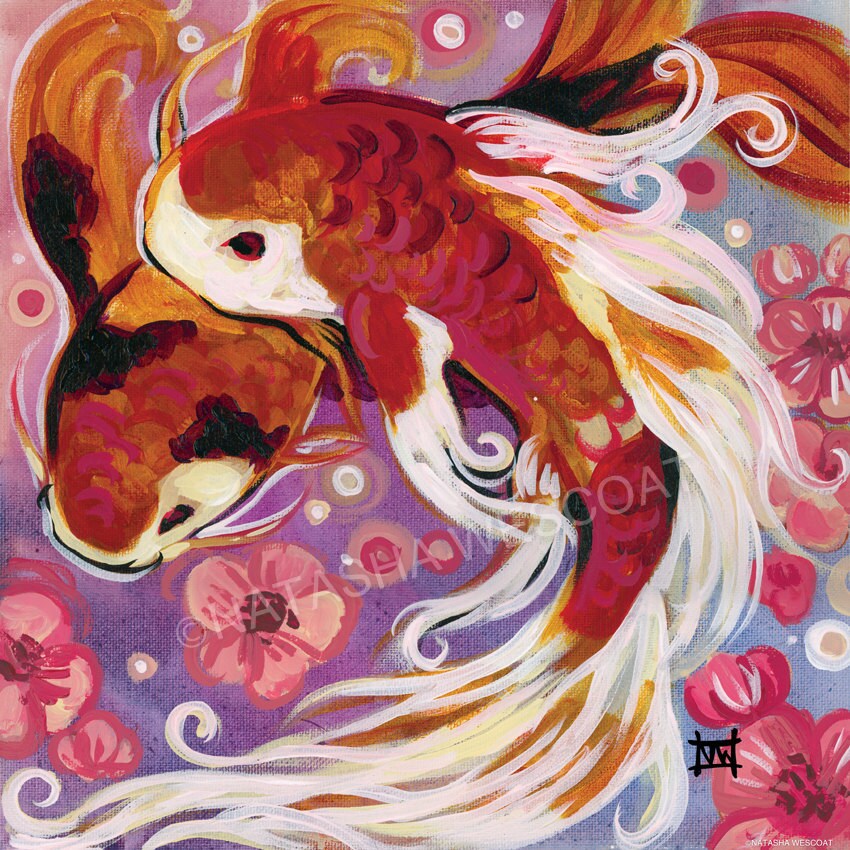
Let me preface this post by pointing out that I have done nails inspired by Natasha Wescoat before.   I really loved her "Gold Coast" painting and did some very similar nails.   Natasha recently posted a picture called "Koi and Cherry Blossoms" on her Facebook page and I am in love.   Unfortunately, we are about to move and need all the money and less things we can get so no paintings for me:(  Still, I had to tackle this nail art and sometimes, I feel like a freakin' Van Gogh with all my art imitatin'.  

*Side note:  Natasha was the first person to see these nails because I messaged her a picture and she responded "Omg that's awesome!!! Thank you for sharing that!"  so I think I have her blessing!*

Incidentally, I believe the Koi painting is still available for purchase on Etsy here.

So here is Natasha's gorgeous painting:


And here is my attempt at flattery in its sincerest form:


I started with  Orly's Nail Armor and then applied one coat of Sinful Colors Snow Me White.   Next I applied a gradient using Milani 3D Holographics Cyberspace and Hi-Res.  It was a little more subtle than I planned but as you can see it worked out great!   Next I used a ton of oranges, pinks, reds, peaches, WnW Black Creme and Sinful Colors Snow Me White to free-hand on the koi and the cherry blossom details.   Yes, it took a while and I watched about four episodes of X-files before finishing this manicure but it was so worth it!   I topped all nails off with one coat of essence colour and go space queen which is an iridescent glitter.   I finished this manicure with a coat of Seche Vite and went to bed! (but not before posting pics in some of my FB polish groups like a fiend!)


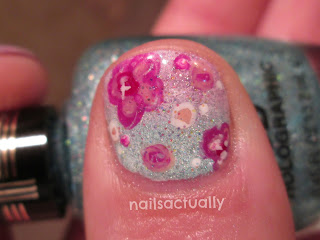


I think these turned out wonderful with a little bit of work and patience and a tiny nail art brush:)    If you can't tell, I am trying to get back into nail art because I did get a little swatch happy there for a while.  I still have 100s of unswatched nail polish but nail art is where I started and while I've gone on to buy loads of gorgeous indie and non-indie polishes and have delved into frankening and polish mixing, I think nail art should always be on my blog.   I love all things nail polish and that's not going to change:)

Friday, November 2, 2012

Jade Holographic Gradient Nails

I cant get enough of my Jades so I made a gradient with Black Magic, Violet Fascination, and Psychedelic.   Pretty sexy, I have to say!


Sunday, June 24, 2012

Neon Gradient Zebra and Leopard Nails: Week 26 of the year of Polish Challenge

This week's assignment for A Year of Polish Challenge was a Neon Manicure.   Neon gradients are so striking so I did my nails up and they decided they needed something.  I decided to practice my freehand zebra and animal prints and I think it works well!   Another Lisa Frank inspired mani!


Gradients are on the challenge list in a couple of weeks so I am getting in some practice ahead of time!

Saturday, May 5, 2012

Tropical Nails aka Hawaiian Nails for tonight's luau: Week 19 of the Year of Polish Challenge

I am looking forward to winding down tonight in celebration of the end of my first semester of library school!  I am going to a luau where I will barely know a soul, I don't have a Hawaiian shirt, and I'm arriving late but I am determined to live it up tonight:0)   In preparation for the festivities and because the Year of Polish Challenge demanded some floral nails, I did some Hawaiian nails that turned out very cute.  I used several different techniques to make a collage of nail art that screams vacation!


I think you'll see me using a lot of blues and purples this summer.  I am inundated with blue and purple polishes and I love every, single one equally so I am going to try to give each polish some wear time even if its just on my toes!

These nails were easier than they look.  I started out with two coats of Inkblot Blue on base-coated nails.  Next, I used White On and a small nail art brush to make hibiscus flower outlines on my thumb nail, a leaf design on my index nail, and the word "Aloha" and the Hawaiian Island outline on my middle nail.  Next using a chunk of cosmetic sponge, I sponged on a half circle of White On to my ring nail and then sponged on  White On onto two-thirds of my pinkie nail in preparation for a gradient.  The gradient was an afterthought.  Normally I would just paint the total nail white and then sponge on the colors but you work with what you have:)

After all the white dried, I filled in the flowers on my thumb nail in Boom Boom, Let's Meet, and Amethyst.  I then filled in the leaf design on my index nail with Happy Ending and accented with Last Chance.  On my middle nail, I filled in "Aloha" with Cloud 9 and the Hawaiian Islands with Happy Ending.  On my ring nail, I sponged on a tiny bit of Inkblot blue to simulate an ocean wave.  On my pinkie nail,  I sponged on a layer of Let's Meet and finished off with a lower layer of Happy Ending.

The next step was some very quick accents.  I used Ebony Loves Chris to make the middle part or pistil of the hibiscus and accent the flower creases.  I used White on to accent the edge of the flower petals and put on the stigma (white dots) on the pistil.   On my pinkie nail, I used Ebony Hates Chris to draw in a oval shape off center at the tip of my nail.  I then dragged out two arcs and added more smaller arcs to the top of the larger arcs to make palm leaf outlines.  I learned this technique from several different youtube and picture tutorials but the gradient palm tree technique by Cute Polish on youtube is a great place to start!  A whole set of nails with the gradient palm tree motif is so cool looking!

Last, I covered all nails with a generous coat of iridescent glitter and a top coat.  The nails look ok without the glitter but I think it adds something extra.

Visions of hula girls dance in my sunglasses' reflections when I look at these nails!

Wednesday, May 2, 2012

Rainbow Brite Nails: Week 18 of the Year of Polish Challenge

This week's Year of Polish Challenge theme was Cartoon Nails.  I admittedly dragged my feet a bit because I was lacking inspiration.  Then I thought about my favorite cartoons growing up and Rainbow Brite was just about it for me in the mid 80s...that and Carebears!  Those shows were little girl, so-cute-you'd-just-die crack shows.  So I found a reference picture on Google with Rainbow Brite, her sidekick Twink, and her horse Starlite.  The picture I used is here.

Now keep in mind that these nail are totally free-hand so forgive my little mistakes.  Overall, you can't miss the theme of these nails...Gah, I'm giddy to show you and I'm going to cry when this mani starts to chip!


So these took a lot of different polishes but who am I kidding, I have at two polishes of every shade or close to it.  I can't really explain how I did the design except to say that I practiced on note cards.  I did start off with Midnight Blue coat on my base coated thumb nail and White On on the rest of my nails.  The pinky nail was done with a gradient sponge that had stripes of Mon Cherry, Sunny Side Up, Let's Meet, Happy Ending, and Midnight Blue applied to the nail twice and then covered with Sally Girl Iridescent Glitter.  For the cartoon characters I colored everything in and then outlined what I could in Ebony Loves Chris.  The flesh color is Julep's Penelope.

Anyway, if there are questions I haven't answered, feel free to ask me them in the comments section!  Oh, and tell me what you think:)

Last but not least, I have some Indie glitter polishes that I have bought specifically to giveaway once I meet 100 GFC followers.  I only need a few more people to follow and I will have at least two winners for my 100 follower giveaway.  So...please share my blog with a friend or two and let them know about the giveaway that will be coming up.  The two bottles of polish I've bought for the giveaway are from Victoriana on Etsy and they are both extra beautiful!!!  I'll post a teaser pic soon!

Friday, April 20, 2012

Week 16 of the Year of Polish Challenge: Gradient Dotticure


I've been wanting to try a gradient using the one step sponge gradient technique from LaynieFingers so I  did it tonight.  But then I remember that my challenge this week is a dotticure.  And my brain smashed the two manis together and the Gradient Dotticure was born!


I did the gradient just like Laynie did with a white base color and gradient colors in Wild Rose, Disco Purple, and Iceberg Lotus.  I then applied small dots in reverse color order.  The Wild Rose didn't show up very good on top of Disco Purple so I added dots in Dream on.  These look pretty cool in my opinion!

Monday, March 26, 2012

Metallic Gradient Nails

I do love a bit of shiny polish plus I've be enamored with Orly's Space Cadet since I bought it a few months ago so these nails just sort of happened from playing around with metallic polishes and a small nail art brush!


 After painting two coats of Space Cadet, I painted thick Metallic Aqua lines at different points across each nail.  I used a small nail art brush to smear the Aqua lines and make them whispy.  I then added Ivanka on both sides of the Aqua lines with a nail art brush and blended them in. 

Saturday, February 25, 2012

Copper and Aqua Gradient Nails

First, I have to say that the picture below does not do these nails justice.  They are much more striking in natural light but since it was 3am, I worked with what I had.


I applied a coat of Venus and then starting layering on Celestial, concentrating the glitter at the tips of the nails and fading it out towards the middle.  I then used gold glitter as the intermediary and the effect is stunning! 

Updated pic:  Got to work early and took this to you could see it in the sunlight!


Saturday, December 31, 2011

2012 Aqua Holo Glitter Nails -- My last post of 2011

I hope all you lovelies have a great end of 2011 and start off 2012 with positivity, energy, and love!  I've already posted some 2012 nails but with Julep polishes arriving today, my nails screamed for an NYE celebration. 

Out of the three new Julep polishes, I chose Megan.  I am a sucker for blue, aqua, and teal polishes and Megan is not only shimmery aqua but very pigmented so two coats turned out beautifully and covered my nails with ease.  Check out my swatch...


As you now know, I simply cannot stop at just polish so I did a sponge applied glitter gradient using Kaleidoscope.  I then drew in 2012 on my four main nails in Snow Me White with a nail art brush.  Last but not least, I used Julep's Fast Drying Top Coat to seal it all in!


*Tip* Putting on a top coat not only protects your glitter or nail art but I find that it takes away some of the roughness that glitter polish can produce on your nails.  You don't want to walk around feeling like you have sand paper on your nails, right?!  Use a top coat and smooth out those tips!


Happy New Year, folks!

Friday, December 30, 2011

2012 Resolutions and Purple Copper Gradient Nails

With the new year almost upon us,  I thought I'd list my five main resolutions for 2012 (trust me, its related to these nails).

1.  I'm going to limit my personal spending to $20 per week.  I've gotten into a really bad habit of ordering things off amazon and I'm trying to curb that habit.  Personal spending is just Sonic teas, gum, and whatever else catches my fancy.  I think I can...

2.  I'm going to try and organize all of my polishes/nail art supplies/mani-pedi items and bring some order to this small corner of our apartment.   While re-organizing my polishes by color today, I found Julep's Alfre and started playing with this shimmery purple polish.  Hence the nails today!  Must get polishes where I can see all the colors and USE them!

3.  Do a better job at keeping in touch with friends and family back in Texas.  We all get caught up in our lives and its easy to pick up a phone and call someone.   I plan to do that more.

4. Be more daring and creative in my nail art.  I plan to scour the web come fashion week for the latest designs to go on my nails.  My nails and nail art WILL be more edgy and now.

5.  Make "A's" in grad school.  For those of you that haven't read yet, I just got accepted into a Master's of Library and Information Sciences program.  In two years I will be a Librarian with cool nails:0)

So onto these nails...


For these nails, I prepped with my usual Pro FX Complete 3 base coat.  Next, I applied the first thin layer of Alfre on each nail.  Alfre is a sensual, smoky purple that shimmers with depth.  I then applied a second thin layer of Alfre and let all nails dry.  Using a cosmetic sponge, I applied a heavy layer of Warm & Fozzie along the edge of each nail and then used the remaining glitter on the sponge to create the gradient effect.  Warm & Fozzie looks copper but has some pink and orange tones that work nicely with Alfre.  I actually put these two polishes together by happy accident and was enthralled.  Not to be outdone, I added the barest swish of some Sally Girl Irredescent Glitter polish on each nail which added some turquoise specks of glitter.  This effect reminds me of oxidized copper and I plan to do more with it.  Last, I applied Julep's Fast Drying Top Coat to seal in all that glitter and goodness!

Hope you like these Purple Copper Gradient Nails!  I can't wait to see what they look like in natural sunlight.

Be on the look out for a post and perhaps even a video showing my organization efforts!

Tuesday, December 27, 2011

New Mexico Sunset Nails

My husband and I made a last minute decision to drive to Texas for a very short visit with our North Texas families last week.  On the way back home through Hwy 287 last night, we ran into an amazing sunset with golds, oranges, blues, and purples.  The moon was a clear crescent and there was a single star right beside it and the landscape of mountains and abandoned farms set black in the background.  I thought what a great set of nails the scene would be.


First, I did a Snow Me White base color over a clear base coat.  I then applied Metallic Purple with a cosmetic sponge at the top of my nails.  I then applied Brisk Blue as my second gradient color and Metallic Yellow as my last gradient color.  I then used Raven to draw in the shadow landscaping at the base of each nail including a lone windmill on my pinkie nail.  I used some more Snow Me White to draw in a crescent moon and stars in the sky.  Last, I applied bits of Luna to the stars and moon for a little bit of sparkle and gave each nail a protective top coat of Julep's Fast Drying Topcoat.

If you ever find yourself on Hwy 287 between Raton, NM and Clayton, NM be on the lookout for some of these shapes and try not to miss the sunset!  I am especially proud of my little windmill...

Saturday, November 26, 2011

Gradient Nails...

I love gradient nails with three or more colors.  I started playing with a dark blue, a shimmery pink, and a shimmery purple but I didnt like how they blended.  I axed the shimmery pink for a full on fuschia color in Sinful Color's Dream On.  I also subbed the dark blue polish for a shimmery black in Sinful Color's Secret Admirer.  I kept the shimmery purple called Sinful Color's Let's Talk. 


For sponging on the gradient you can buy a nail art sponge kit but I find that those foam makeup wedges work great for me.  Doing this can be messy so be sure that you have lots of qtips and acetone!   Also, after it was all said and done, I decided to add irredescent glitter from Sally girl to each nail.  The 2nd pic does not do these nails justice.  They looked 10x better in person.  My camera is a cheap Kodak Easyshare so the bright colors do not shine through!   I still loved them and rocked them for Thanksgiving day. 

One other tip with gradient is to put the top color and bottom colors on first and then blend them with the middle color, especially if the middle color is darker than the other two colors.  You also want to be sure you use a thin line of sponge with the middle color or it can take over the whole nail like it does with mine.  Happy gradients, people!