Saturday, May 5, 2012

Glittery Rollin' in the Deep (Ocean) Nails

In tandem with my most recent nails, Hawaiian Nails, I also did a super easy mani that reminds me of the bottom of the ocean on my right hand.  Oh, that dreaded right hand ;-/  Anyway, it only took three polishes to accomplish and I am quite proud of the results!  I call these nails Rollin' in the Deep (Ocean) Nails:)


(above pic in natural sunlight)


After applying no less than two thin coats of Inkblot Blue to base-coated nails and letting the polish dry, I then added one coat of Sally Girl's Iridescent glitter.  Next, I sponged on Across the Universe onto the tips of my nails and half way up. Its ok that Across the Universe glitter is suspended in a black base because the black polish dries a sheer smoky color and barely tints the polish underneath.  The green and teal glitters really pop on Inkblot Blue.   Last I did a generous swish of Chunky Silver on a note card and used a toothpick to pick up large and small hex glitters and placed them in random arched lines of three to simulate bubbles. 

The only thing I would do differently is add more layers of topcoat so that the finish is smoother but I am very happy with these nails.  Striking!

Tropical Nails aka Hawaiian Nails for tonight's luau: Week 19 of the Year of Polish Challenge

I am looking forward to winding down tonight in celebration of the end of my first semester of library school!  I am going to a luau where I will barely know a soul, I don't have a Hawaiian shirt, and I'm arriving late but I am determined to live it up tonight:0)   In preparation for the festivities and because the Year of Polish Challenge demanded some floral nails, I did some Hawaiian nails that turned out very cute.  I used several different techniques to make a collage of nail art that screams vacation!


I think you'll see me using a lot of blues and purples this summer.  I am inundated with blue and purple polishes and I love every, single one equally so I am going to try to give each polish some wear time even if its just on my toes!

These nails were easier than they look.  I started out with two coats of Inkblot Blue on base-coated nails.  Next, I used White On and a small nail art brush to make hibiscus flower outlines on my thumb nail, a leaf design on my index nail, and the word "Aloha" and the Hawaiian Island outline on my middle nail.  Next using a chunk of cosmetic sponge, I sponged on a half circle of White On to my ring nail and then sponged on  White On onto two-thirds of my pinkie nail in preparation for a gradient.  The gradient was an afterthought.  Normally I would just paint the total nail white and then sponge on the colors but you work with what you have:)

After all the white dried, I filled in the flowers on my thumb nail in Boom Boom, Let's Meet, and Amethyst.  I then filled in the leaf design on my index nail with Happy Ending and accented with Last Chance.  On my middle nail, I filled in "Aloha" with Cloud 9 and the Hawaiian Islands with Happy Ending.  On my ring nail, I sponged on a tiny bit of Inkblot blue to simulate an ocean wave.  On my pinkie nail,  I sponged on a layer of Let's Meet and finished off with a lower layer of Happy Ending.

The next step was some very quick accents.  I used Ebony Loves Chris to make the middle part or pistil of the hibiscus and accent the flower creases.  I used White on to accent the edge of the flower petals and put on the stigma (white dots) on the pistil.   On my pinkie nail, I used Ebony Hates Chris to draw in a oval shape off center at the tip of my nail.  I then dragged out two arcs and added more smaller arcs to the top of the larger arcs to make palm leaf outlines.  I learned this technique from several different youtube and picture tutorials but the gradient palm tree technique by Cute Polish on youtube is a great place to start!  A whole set of nails with the gradient palm tree motif is so cool looking!

Last, I covered all nails with a generous coat of iridescent glitter and a top coat.  The nails look ok without the glitter but I think it adds something extra.

Visions of hula girls dance in my sunglasses' reflections when I look at these nails!

Wednesday, May 2, 2012

Rainbow Brite Nails: Week 18 of the Year of Polish Challenge

This week's Year of Polish Challenge theme was Cartoon Nails.  I admittedly dragged my feet a bit because I was lacking inspiration.  Then I thought about my favorite cartoons growing up and Rainbow Brite was just about it for me in the mid 80s...that and Carebears!  Those shows were little girl, so-cute-you'd-just-die crack shows.  So I found a reference picture on Google with Rainbow Brite, her sidekick Twink, and her horse Starlite.  The picture I used is here.

Now keep in mind that these nail are totally free-hand so forgive my little mistakes.  Overall, you can't miss the theme of these nails...Gah, I'm giddy to show you and I'm going to cry when this mani starts to chip!


So these took a lot of different polishes but who am I kidding, I have at two polishes of every shade or close to it.  I can't really explain how I did the design except to say that I practiced on note cards.  I did start off with Midnight Blue coat on my base coated thumb nail and White On on the rest of my nails.  The pinky nail was done with a gradient sponge that had stripes of Mon Cherry, Sunny Side Up, Let's Meet, Happy Ending, and Midnight Blue applied to the nail twice and then covered with Sally Girl Iridescent Glitter.  For the cartoon characters I colored everything in and then outlined what I could in Ebony Loves Chris.  The flesh color is Julep's Penelope.

Anyway, if there are questions I haven't answered, feel free to ask me them in the comments section!  Oh, and tell me what you think:)

Last but not least, I have some Indie glitter polishes that I have bought specifically to giveaway once I meet 100 GFC followers.  I only need a few more people to follow and I will have at least two winners for my 100 follower giveaway.  So...please share my blog with a friend or two and let them know about the giveaway that will be coming up.  The two bottles of polish I've bought for the giveaway are from Victoriana on Etsy and they are both extra beautiful!!!  I'll post a teaser pic soon!

Black Swirl Nails


This is just a quick post because, dear readers, I am in the throes of finals and have almost completed my first semester of Library School!  A quick side note to anyone contemplating grad school--its hard work but I am a much better student at 32 than I ever was at 20.  Priorities and all that!


I did these nails by doing a couple of gorgeous layers KleanColor's Golden Nirvana (picture of the bottle is in this blog post) over base-coated nails.  I then used Wet N' Wild's Black Creme and freehanded all of these different swirls.  I can't decide which is my favorite because they are all visually interesting! 

Tuesday, May 1, 2012

Seuss Nails!


I have been salivating to get my hands on Seuss from Whimsical Ideas by Pam (see Chalkboard Nails swatch of Seuss here) but its $10 a bottle and I'm on a polish buying hiatus right now, mainly due to the fact that I'm out of polish room again:(  Hopefully I can buy another polish rack soon so I can be the proud owner of more indie polishes and please my husband with my incredible financial restraint ;0/

Anyway, until I finally own Seuss I did some layering with some glitters and I think these turned out quite cute!


Moon Dust (a sparkly royal blue with hints of purple) was acquired recently at Claire's.   I think it actually made by Color Club.  I did two coats of Moon Dust over base-coated nails.  I then painted the tips with a couple of layers of Milani Red glitters.  I picked out a few large white glitters and some smaller glitters from my Pretty & Polished Hello Dolly glitter polish and used Sinful Colors Snow Me White to freehand "Seuss" with one letter on each nail.  Last, I covered the whole lovely mess with some protective top coat.

It appeases my polish hunger...for now!

Saturday, April 28, 2012

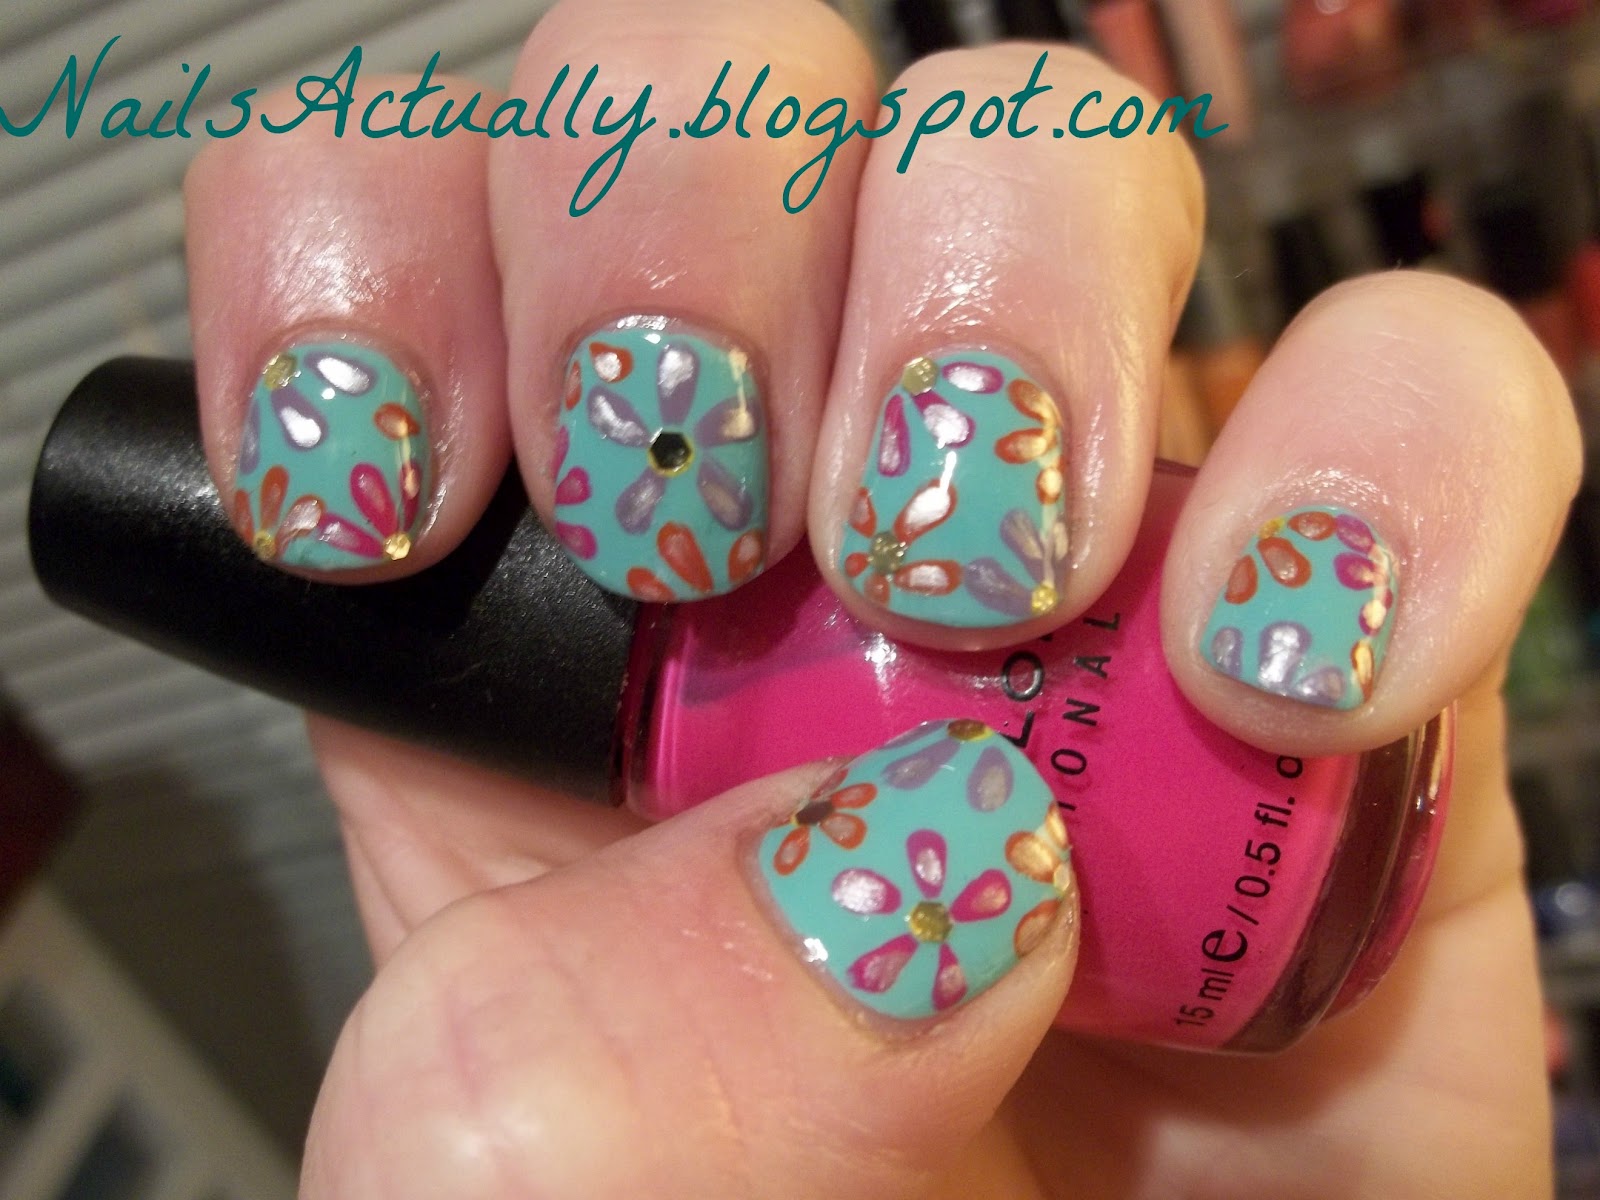
Earth Day is EVERY day Flower Power Nails: Week

Testing, testing *tap,tap,tap* Is this thing on?  Its WEEK 17 of the Year of Polish Challenge!!

To be honest, I really put off this week's challenge almost in protest because I really do feel that Earth Day is every day (or should be)!  Then I was reading the Challenge closely and it says Earth Appreciation for this week.  One of the most beautiful natural things to me on Earth is flowers.  Its pretty evident that I love having flowers on my nails!  So I went with it and was not let down!!

To give credit where due, the flowers on these nails are inspired by lovely and down-to-Earth Robin Moses (Cheerful Flowers and others)  but with a Nails, Actually spin!  Please check out Robin's nail art on Facebook, Youtube, Twitter, and her blog?  You won't be disappointed!


I did these by first applying one generous coat of I Need a Refresh-Mint to base coated nails.   I then used Robin Moses' petal brush strokes to create flowers in Planks A Lot, Boom Boom, and Big Daddy.  I used a nail art brush to put dots of Sunshine in the middle of each flower then had the exceptional idea to use the large hex glitters from Golden Nirvana (Klean Color) to be my flower centers.  Last, I used Tokyo Pearl to add shiny accents to each petal and covered with Julep's Fast Drying Topcoat!  These nails started out being so so but now finished they are some of my favorites!

Power to the Flower!

Glitter Starburst Nails

As promised, I've done some more nails with the ultra striking but painstaking glitter placement!  These actually didn't take long at all to do and turned out so great!


Essentially, I put on one coat of Julep's Helena over base coated nails.  I then brushed on Julep's Brooke for some shimmer.  I then brushed a generous amount of Milani Glitters Teal onto a notecard and picked out the large teal glitters.  Since the Milani glitter is suspended in clear lacquer I just picked up each teal glitter with a toothpick and quickly placed it on the nail in a starburst pattern.  They have enough polish on them to stick, generally!   I do love how these turned out!  I'm thinking next about doing a mosaic design in this fashion on one nail.  What do you think?  Cool?

Friday, April 27, 2012

Morse Code Nails

Don't you just love Pinterest?  These nails are directly inspired by something I found on Pinterest and thought "what a neat idea for nails?!"

Incidentally, the note card below is the source of my inspiration for these Morse Code Nails:


Cute right?  You can actually buy them here!

Without further ado, here are the nails in question!


I think the design and colors for these nails make them . . .  - - -    -.-.  - - -  - - -  .-..!

Thursday, April 26, 2012

Late April Polish Haul *Pic Heavy*

So...I broke down and bought/ordered more polish.   I can't help it if I have a good eye for great deals and too-die-for glitter polishes!


First, I have to share how I scored the Pretty and Polished polishes.  I essentially stalked the Facebook and Etsy site until the bottles dropped and snatched them up within a few minutes.


Now, I *know* that there is controversy about Sticks N' Stones being the Lynnderella Connect the Dots dupe.  I also know that I've waited months to order from Lynderella and have YET to get my hands on one bottle of any Lynnderella polishes :(  When it becomes available again, I plan to buy some Lynnderella polishes but until then, I plan to enjoy Sticks N Stones without guilt!


So a rare swatch fest ensued because I just had to see what these new indie glitters looked like!  Sticks N Stones is over a base of Julep's Taylor,
Party On My Yacht is alone, two coats,
Jawbreaker is alone, two coats,
Hello, Dolly is over a base of Julep's Emilie,
Valentino is over a base of Sinful Colors Forever Pink!

Next, I have to share the awesome stash of Klean Color polishes I bought for $1 each at a flea market in Cleburne.   I have been searching for Chunky Holos for quite a while and when I came across these, I snapped them up!  I also bought the six other polishes below!


 I ordered this Resort collection mini set from Ulta and adore every polish.  So pretty!


I cannot contain my excitement to finally own some Hits polishes!  I ordered these from Llarowe and they are worth every penny!


I found these darling polishes by Jessie's Girl at Rite Aid!


These Julep polishes are part of my $50 gift certificate order from my Easter Mystery Box!


Couldn't resist buying this chunky red glitter.  I have some ideas in mind!


My Sinful Color collection keeps growing!  Check out these gorgeous polishes!


I read about Wet N Wild Chrome polish on Nouveau Cheap's blog and went around town trying to find them .  I was successful at an out-of-the-way Rite Aid!!


This polish fiend is such a lucky girl!   Can't wait to use all of these in some awesome nail art!