Wednesday, November 30, 2011

Snombie Love Nails

What does a Snowman that been infected with the Zombie virus become?  A Snombie.  I came across this delightful little cartoon and was inspired to do some Snombie nails. Ah... but not just any Snombie nails...no.  While in the midst of sketching out the design I thought, we gotta add some brains and some love.  So the Snowgirl victim falls for her Snombie attacker.


Started out with clear basecoat then applied two coats of Sinful Colors Snow Me White on thumb and pinky nails.  I applied Sinful Colors Why Not to the other three nails on each hand.  I mixed Sally Hansen's Hard as Nails Limestone and Sinful Colors Savage to make a sickly green and used Snow Me White again to make Snowgirl.  I used Sinful Colors Ruby Ruby for red accents, China Glaze's Recycle for the Snombie scarf and heart, Sinful Colors Nirvana for the Snombie nose, Sinful Colors Cloud 9 for the Snowgirl nose, and Sinful Colors Soul Mate for the brain material. I used Sally Hansen's Xtremewear Black Out to outline everything.


On the other hand, I again used Black Out to make "Snombie" and outline the brain and used Sinful Colors Sugar Sugar for "Love."  Used Soul Mate yet again to make the brain.  Highlights on the black letters using Snow Me White.  All and all, very fun nails to kick off the Christmas holidays...

Tuesday, November 29, 2011

Flamenco Inspired French Tip Nails

I had just received my Konad French Tip plate M19 and needed a design.  I absolutely love french tips even for my extremely short nails.   This design pretty much came out of nothing.  The only thing I actually planned to do was to have black french tips.  Using Essie's Licorice, I applied the french tip stamp to each nail.


From the french tips, I decided to apply a rose image from an image plate.  I think I was watching "Dancing with the Stars" or something because once I decided to add the rose image it came together and I had a theme!  I am not entirely sure which plate I used so if you want to know, please contact me and I will take a look at my images plates to ascertain which brand and plate was used.  I did apply the rose image in different places on each nail.  The rose image was so large that I could really only fit one on each nail.   I then freehanded two leaves for each rose with a nail art brush in Sally Hansen's Lickety Split Lime.  Last I applied a topcoat in Wet N Wild Fast Dry's Party of Five glitter.   I really like the uncolored nail background in this design.

Note to self: do more natural nail background in nail art!

Print Inspiration, Yet Again...Retro Polka Dots from a Myspace Layout image

Since getting dotting tools in the mail about an month ago, you can tell I've been busy dreaming up or being inspired to used the tools in new ways.  I was inspired by the Myspace layout found here, the layout entitled "Pink and Black Rings."  I did not like the jacks-like images throughout the layout or the thin rings nor did I like the colors much.  Moreover, I had just gotten in my 2nd Julep Maven box that had three Julep polishes, including a sexy navy blue called Michelle.  I decided that Julep's Michelle would be my base color.


After applying the base color, I used Sinful Colors' Snow Me White, Dream On (Fuchsia), and Love Nails to make random circular and oval dots with differently sized dotting tools.   I then filled in the dots with the same colors and the base color.  It seemed to work out ok but I think perhaps I need a steadier hand!  Applied a topcoat, and that was that!

Print Inspiration for Nail Art

As I've said before, nail art ideas can strike me at the oddest times and truthfully seeing the strangest patterns can also get the creative polish flowing. 

I saw the print below while searching for background images and instantly decided I wanted the design on my nails. 


The only problem I really had was at the time, I didn't have a single grey polish to use.  I decided the next best thing (or even better thing) was to use silver polish as my background color.


So after applying a clear basecoat, I applied one coat of Sally Hansen's Xtremewear Celeb City.  I then used two different sized dotting tools to make random, but connected dot patterns on each nails in Sinful Colors' Snow Me White.   I then filled in the middle of each dot with the three colors I had that most closely matched the colors in the print.  In my case, it was China Glaze's For Audrey, Sinful Colors' Why Not, and Sally Hansen's Insta-Dri Lickety Split Lime, taking care to leave a ring of white background behind each dot.   This print would look so great in other colors.  Have fun mixing and be sure to send me pics of your results.

Fun with Bundle Monster's Snake Skin Stamp

I love nail art stamping and one of my favorite stamps thus far has been the snake skin stamp from plate BM 215.  You could do the design in tons of color combinations and never get bored with it!  So far I've done two sets of nails with the snake skin stamp.  

First, as soon as I got the stamp in I tried these nails:


After applying base coat, I used Sally Hansen's Insta-Dry Pronto Purple as a base color.  Then I used Sally Hansen's Xtremewear Lacey Lilac in the snake skin stamp and applied it over each nails.  To add a little more sparkle, I then covered each nail with irredescent glitter from Sally Girl. 

My next set of nails that I did with the snake skin stamp came out SEXY!  But then, I think anything I do using China Glaze's For Audrey is sexy, lol! 


After applying a clear basecoat, I used Sinful Color's Secret Admirer as my base color.  I love this color because its black but sparkly!   I then applied China Glaze's For Audrey to the snake skin impression and stamped it on to my nail.  I love how this design and color scheme turned out!  I can't believe how it pops on the darker base color.  I then applied a topcoat to seal in the stamp. 

Can't get enough of stamping!

Nails inspired by Gaga's "You & I" Video

I love Lady Gaga and I don't care who knows it.  Her crazy fashion and killer songs are so inspirational!  One of my favorite songs right now is "You & I" and I adore the music video for it!  I saw the video and immediately sketched out a quick design for nails. 


So for the thumb I used a base with KleanColor's Metallic Green and did a scale design over that in Revlon's Gold Coin to represent Gaga's mermaid tail.  On my index finger, I used a base of Sinful Colors' Vacation Time  and outlined my entire nail with Essie's Black Licorice and then filled in the stripes to simulate her black hat.   The middle finger has a China Glaze's For Audrey base with the words "You And I" written in Essie's Black Licorice.  It was covered with Sally Hansen's Xtremewear In the Spotlight glitter.  On my ring finger I wanted to simulate the corn field from the video and started with KleanColor's Metallic Sapphire and filled in with swishes of InstaDri's Lickety Split Lime.  Last, filled in my pinky nail with a coat of China Glaze's For Audrey and used Essie's Black Licorice to paint in stripes inspired by Gaga and her dancers strappy costumes.  I sealed them all with a topcoat and voila! Gaga's You and I nails.

Monday, November 28, 2011

Youtube Inspiration: CutePolish's Vintage Rose Tutorial

Trolling for cute nail art on youtube a few months ago, I found this tutorial and finally had the time and polish to try it out.  Cute Polish has tons of nail art tutorials so be sure to subscribe to her on youtube!  Also, you can see Cute Polish's Vintage Rose tutorial here!


After a clear base coat, I applied two coats of Revlon's Blue Lagoon.  Using my largest dotting tool I placed random dots all over each nail in Sinful Color's Soul Mate.  For petal detail, I used Petite's Rock N Red.  Last, I used KleanColor's Metallic Green for leaves.  Topped with ProX Complete 3 to seal it all in.

To see exactly how to do these nails and to get some tips and tricks, do check out the youtube tutorial for these.   The tutorial was quick and easy and all credit is to be given to Cute Polish!  How cute are these nails?

Saturday, November 26, 2011

Scented Polish and some cute Rose nail art!

Had a lazy Saturday but we did venture to Walmart where I finally bought some of Revlon's scented polish.  I chose Revlon's Mon Cherry.  It says to use two coats but I was able to get great, solid coverage with one coat.  It does smell like cherries!


So, while I love this color by itself, this is a nail art blog and I am a nail art fanatic so I broke out the stamping and rhinestones again.  While playing with a clear 3D rhinestone and four black teardrop rhinestones I formed a sort of rose look.  I searched through my stamping plates and found the scrolling design on Bundle Monster plate 201 and stamped it on to my thumb nails in Konad White stamping polish.  I then put a clear topcoat to seal the stamp and placed my rhinestone design on each thumb.   I really think that doing this on every nail would be a bit of overkill but Im sure it would look cute if you want to try!  I added green teardrop rhinestones to act as leaves for the roses.  Last I added one more layer of topcoat in hopes to seal the rhinestones to the nail.  We'll see how well they hold up!  Hope you like them:)

Gradient Nails...

I love gradient nails with three or more colors.  I started playing with a dark blue, a shimmery pink, and a shimmery purple but I didnt like how they blended.  I axed the shimmery pink for a full on fuschia color in Sinful Color's Dream On.  I also subbed the dark blue polish for a shimmery black in Sinful Color's Secret Admirer.  I kept the shimmery purple called Sinful Color's Let's Talk. 


For sponging on the gradient you can buy a nail art sponge kit but I find that those foam makeup wedges work great for me.  Doing this can be messy so be sure that you have lots of qtips and acetone!   Also, after it was all said and done, I decided to add irredescent glitter from Sally girl to each nail.  The 2nd pic does not do these nails justice.  They looked 10x better in person.  My camera is a cheap Kodak Easyshare so the bright colors do not shine through!   I still loved them and rocked them for Thanksgiving day. 

One other tip with gradient is to put the top color and bottom colors on first and then blend them with the middle color, especially if the middle color is darker than the other two colors.  You also want to be sure you use a thin line of sponge with the middle color or it can take over the whole nail like it does with mine.  Happy gradients, people!

Tuesday, November 22, 2011

Shooting Stars: A first attempt at confetti and rhinestone application

So I received the package today with all my new rhinestones and glitter confetti and had to break it out right away.


For these nails, I did two coats of Sinful Colors Midnight Blue followed by a coat of Sinful Colors Frenzy.   I then glued silver and light blue stars on each nail in a random pattern. I topped off the two largest stars on each thumb with an accent rhinestone and then used concentrated Xtremewear In the Spotlight glitter strips to simulate a shooting star effect.  I think they turned out fun!

Paisley Fun

I cannot get enough of this stamp from Bundle Monster. Of course, Konad has a very nice paisley stamp but this one, to me, offers more versatility.


Base coat, color base of Julep's Drew, Konad stamping polish in white, and a mixture of Sinful Colors Love Nails and Sally Hansen InstaDri Brisk Blue for dots. Smidge of irredescent glitter polish on each blue dot and clear top coat.


T-Shirt Inspiration for Nail Art

Often I see an object, a saying, or design that I think would look awesome on my nails.  I even see sequin dresses that I pin to my Nail Art! board on Pinterest that I say I'd rather wear on my nails.  Such as the case with this next set of nails.  I saw this shirt....


and thought, "I need some nails that say that!"  A little nudge sometimes is all you need.

Here are my "PeaceLoveRecycle" nails.


A longer nail might be better for the word recycle or you could just use the recycle symbol.  I used two coats of Sinful Colors Why Not and drew letters and picture outlines with Wet N' Wild's Black.  I drew in the earth part of the globe first in Sinful Colors Snow Me White and then covered it with Xtremewear's Ivy League.  The Peace Heart is filled in with Wet n Wild's Lavendar creme.  All nails were then covered with an irredescent glitter and I used Diamond Strength Diamonds.

The Rhinestones (and Confetti) arrived!

Last week I was cruising through Amazon.com (what else is new!?) and ran into some great deals from MASH. 

I bought the Premium MASH 2400 piece 12 color Nail art Manicure Wheels with 3D Design Rhinestones for $6.99,  The MASH premium Nail Art Manicure Glitter confetti Shapes for $6.50, and the best deal was the premium MASH 1200 piece 12 color Nail Art 3D design Tear Rain Drop Rhinestones for $1.99.   The total for this came to $15.48 and it was free shipping!

Check out my new stuff!


Can't wait to get some of these on my nails and share:0)

Monday, November 21, 2011

Wizard of Oz nails

So if you haven't noticed yet, I prefer to put images on my nails that symbolize parts of movies, videos, and books.  I don't even try to paint faces or characters.  For one, Im sure I would suck at painting faces with nail polish.  For another, I like more subtle nail art.  So my Wizard of Oz nails have neither Dorothy and her gang nor the rest of the cast of characters.  Take a look!


Starting with a basecoat, I then painted every nail but the index finger with InstaDri Whirlwind white.  I do not advice using InstaDri colors for designs you want to last.  Thats just what I happened to grab and I was in a hurry to get it to dry.  On the index finger, I painted that nail with Sally Hansen's Xtremewear Black Out. I painted a thin coat of Sinful Colors Tokyo Pearl on each thumb nail.  On the index finger, I painted a slipper outline with bow in Sinful Colors Snow Me White.  My middle nail was first painted with Sinful Colors Glass Pink but I didnt like the effect so I painted over that color with Petite's French Pink and then added another layer of Sinful Colors Glass Pink for sparkle.  I also painted the outline of the wand in Sinful Color's Snow Me White.  The silver color is simply Kiss Nail Art's silver with its striper brush.  When it didnt fully pop, I added black lines using Kiss Nail Art's black stripping polish.  On my ring finger, I made a rough outline of the Emerald City using Xtremewear's Ivy League but again it didnt show up like I wanted so I added Sinful Colors glitter in Call You Later and accent stripes in a darker green, Sinful Colors San Francisco.  Later for even more definition I added Kiss Nail Art Black striping polish.  The sky is Sinful Colors Why Not. Last but not least my pinky nail is, of course, the yellow brick road.  I painted a base color in Sinful Color's Lets Meet and then drew in brick lines with Kiss Nail Art White striping polish and brush.  I filled in the lines with Revlon's Gold Coin but added Kiss Nail Art Black striping polish to add more to the brick layout.  On my thumb, I mixed Xtremewear's Black Out with Sinful Colors' Tokyo Pearl to get a messy, sparkly grey color.  I freehanded a tornado with that color and added more lines with my black striping polish and brush.   I wrote Oz right beside the tornado in Gold Coin and outlined it again with black striping polish.  For a little sparkly debris, I did a thin coat of Xtremewear's In the Spotlight glitter strips.  They may or may not show up in the picture but it looked great in person! 

One thing I'd do differently is probably add the roof of a house swirling in the tornado.  I thought of it after I finished and was too tired to add it this time. 

I am loving my Kiss Nail Art Striping polishes in Black, White, and Silver.  I always have something to use them for and the striping brushes in the polish work well for small detail that the rest of my nail art brushes can't always accomplish! 

Last, I did the other hand the exact same way albeit not as pretty.   My poor right hand is always the mistreated stepchild in my nail art.

Let me know what you think!

Sunday, November 20, 2011

Breaking Dawn nails for premiere weekend!

These nails were very impromptu.  I ended up having a couple of extra hours before I had to leave to get to the 7pm show because people in CO are not as crazed about Twilight movies as people in TX.  There were no lines to get in! Anywayz...

I think the nails turned out great for a quick, fun set!


These nails are loosely based on the Breaking Dawn book cover art.  See it here! 

As always, I put on a clear, protective basecoat.  I then painted all nails with Sally Hansen's Xtremewear Blackout.  Next I stamped a checker pattern from BM16 with Konad white stamping polish on my four main nails on each hand.  I rotated the checker pattern to change up the design a little bit. The queen chess piece was painted with Sinful Colors Snow Me White with OPI Scull & Glossbones shadows. The pawn chess piece was first painted with Sinful colors Snow Me White and then covered with Sinful Colors Sugar Sugar then shadows added with Kiss Nail Art Black. Sealed  it all with a top coat!

Poster Nails

I'm an avid pinner of all things on Pinterest.com.  I even have a nail art board and a nail art inspiration board there!  Since I joined, I've seen tons of pins depicting many different posters based on the same concept:  Keep Calm and...  One day I decided to do Keep Calm nails and the following was the result:


I really do need to get a steadier hand and some better handwriting but I think these nails do get their point across nicely!  I used ESSIE Turquoise and Caicos for the base and Sinful Colors Snow Me White for the letters.  I used a bundlemonster plate to stamp a crown image on the "Keep" thumb. 

As for me, I "Keep Calm and..." add more glitter to my nails!

Youtube Inspiration: Miss80Millions Multi-color Dots tutorial!

If you are like me you probably pour over nail art blogs, tutorials, and pictures.  I recently stumbled  across a tutorial from Miss80million on youtube.  Watch it here!


Here is a picture of my results:


I'll just put it out there that I did not follow Miss80Million's suggestion to keep the surrounding dots small.  She was absolutely right that the end result would be chunky.  Next time, I will use a smaller dotting tool to create this design.   Also, since I haven't ventured into rhinestones yet, I didn't have a jewel to put in the middle dot so I just used some glitter.  

As usual, I started out with a clear basecoat and then applied Sally Hansen Xtremewear Black Out to every nail.  I then used Sinful Colors Snow me to make base dots and  filled in  the dots with Sinful Colors Dream On, Cloud 9, Lets Talk, and Gorgeous.  The middle dot is KleanColor Metallic Yellow topped with some Sally girl gold glitter.

Note:  I did recently purchase some rhinestones and glitter confetti from amazon.com and as soon as I get them I will do a post on what I recieved :0)

Saturday, November 19, 2011

Nails Imitating Art

I've been following the artist, Natasha Westcoat on Facebook ever since I happened on to her website.  I fell IN LOVE with her tree paintings.  Its my fondest wish to have an original painting.  I think I will one day soon!   If you love her paintings, please add her as a facebook friend AND buy her paintings.  They are now sold as prints in all kinds of stores!  I was inspired by one particular painting from Natasha called "Gold Coast" and you can see it below.


The nails I came up with based off the above painting were these....


I used a Sinful Colors Snow me white base, Revlon Gold Coin  for the hills, mixture of Stripes Black, Essie Licorice, and Wet n Wild black for outline, trees and black dots, and multiple other colors for rest of dots.  The bulk of the art was accomplished by a nail art brush but the dots were formed from two or three different sized dotting tools.

My nail art can be influenced from paintings, fabric, graphics, books, movies, wall paper, photos, and even music videos.  Pull your nail art influences from things you love too, and you'll always love them!

New to Nail Art

A few months ago I looked at the blog of a friend from a forum and was blown away by her nail art.  Flash forward a few months and I have loads of pictures of my own nail art.  Some of the nail art is my design, others are inspired by other artists.  Should I use another artist's design, I will always strive to give credit.  Since "Love, Actually" is my favorite movie and I recently did the nails below in honor of the movie,  I decided to name my blog Nails, Actually!  To my knowledge, I haven't come across a nail  or nail art blog called this.  Please inform me if you have! 

I have no preference for any brand of polish and recently I have amassed over 100 bottles of polish.  Brands so far include:  OPI, Nicole by OPI, OPI for Sephora, Nails Inc, China Glaze, Sinful Colors, Sally Hansen (all kinds), Kiss Nail Art, Essie, Wet N' Wild, Revlon, KleanColor, Petite, Bon Bon, and Sally Girl.  I will try to credit the brand and color of each polish I use.  I tend to use Sinful Colors and Wet N' Wild colors more only because a lot of them were 99cent purchases and I am less likely to use up an $8 polish than I am a 99cent one.  Im "thrify" that way.

As for polish remover, I recommend acetone over non-.  It works better for the layers that my nail art often involves!  Not to mention it takes off glitter way easier.  I tend to use Q-tips for removal.

I also freehand a lot but I do often use stamping plates from Konad and Bundle Monster too.  If I uses a stamp, I will let you know which brand and plate was used as well as what polish.  Currently I only have gold, silver, and white Konad stamping polish and the rest is from regular brands.

You'll see a lot more fingernails painted on this blog than toe nails.  I only do my toes every two weeks not to mention I don't particularly like my toes anyway.

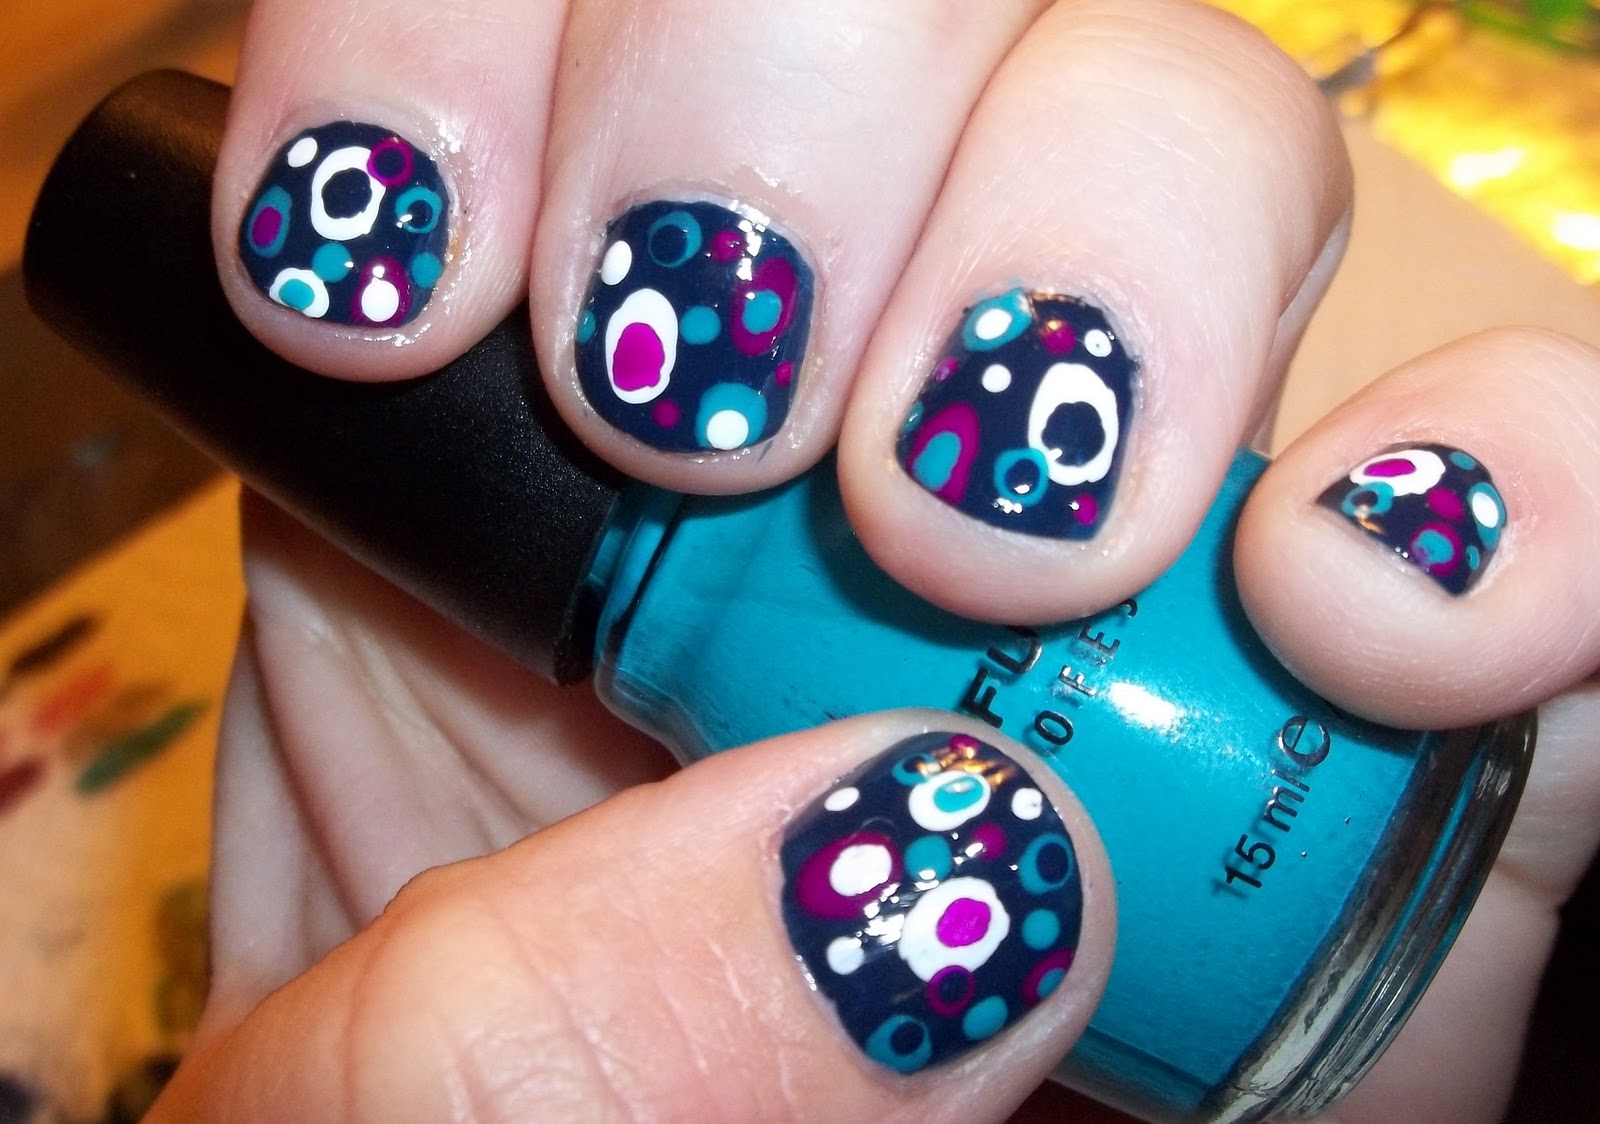
Please keep in mind that I am still learning and practicing.  I may start working on fake nails just to practice more.  Almost always the picture will depict my left hand for obvious reasons...since I'm right handed and not ambidextrous, my left hand always looks significantly better.  I do welcome constructive criticism but I look at this as a hobby so please don't expect my art to be on par with people who do nail art for a living.  Should you use any of my designs or designs I credit to someone else, or use any pictures posted on to Nails, Actually please give credit

On nail length:  I work a fulltime job that requires a lot of typing, mouse clicking, and general hand usage.  Therefore, my nails are kept short and I don't plan to sport fake nails anytime soon.  I simply do not like the aftermath nails from having fake nails.  Its a personal choice and any creative or industrious soul can modify any of my designs for longer nails with my blessing.  I don't see a lot of nail art blogs featuring short nails so why not my blog?

Last and final thing to say is that I will always attempt to share exactly how I did a design.  I dislike when nail art people show their awesome work on blogs and networking sites but then do not share any tips on how to recreate the look.  Nail art is subjective and my freehanded stuff is simply me muddling through until I get the look I want.  Its trial and error but I will try to share tips and elements that make a design look finished.

On to the first set of nails...


These nails are my design in honor of my FAVORITE movie of all time, "Love, Actually." I started with a clear base coat, then one coat of InstaDri's Whirlwind White. Then I applied a thin coat of Sinful Colors Tokyo Pearl. I used Xtremewear's Black out and Kiss's Nail Art Black (for the letters, musical notes, and outline), Petite's Rock N Red for the ribbon, KleanColor's Metallic Yellow for the necklace, and Sinful Color's Sugar Sugar for the jewel on the necklace and the tiny hearts.  "All You Need is Love," is sang at a wedding in the movie.  The bow is from the movie case or cover.  The necklace, though pretty, actually represents new love/lust but also ends a marriage in the film.  Hearts and musical notes for obvious reasons!  On my other hand I did the same pictures except the words were changed to "Love-Is All-You Need."